Buy Alprazolam Cheap Online Cheap Valium Buy Xanax Cod Delivery Order Xanax 2Mg Buy Valium China

How NOT to Make an Ice Cream Cake

0
Share

Picture

This was DELICIOUS.
However, don’t do what I did. Follow the instructions of someone who knows what they are doing.
Or…
If you don’t like being told how to do something, and you prefer being AWESOME, read on.

Tip of the Day: Do not assemble an ice cream cake when the cake parts are still hot.

     My birthday this year was quite uneventful, so I decided that my birthday cake would be special: Ice cream cake! I’ve never made one before, and haven’t had one since elementary school, when other kids had those Carvel cakes at their parties. So now it was my time. (THIS SHOULD HAVE BEEN MY TIIIIME!) However, I didn’t think the process through enough. So, this post is more of a ‘What Not to Do’ version of ‘How to Make an Ice Cream Cake’. Some truly amazing cake wreck pictures wait ahead. 

Picture

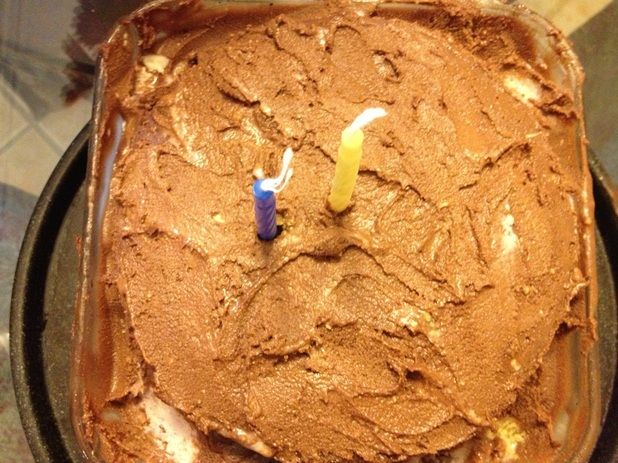
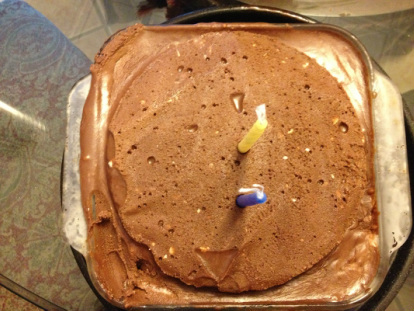
It looks nice, right? 

What’s hard to tell, though, is that the frosting melted into the top, coloring the cake, and then all of it slid off into those soupy corners, mixing with the ice cream to make admittedly delicious, viscous plasma. The top looks iced, but it’s mostly just the cocoa that seeped into the pores.
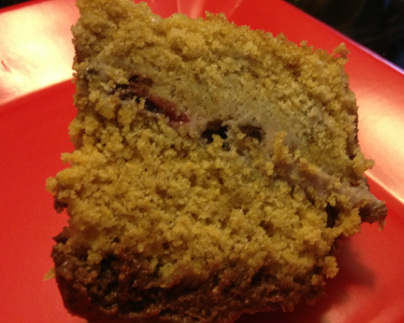

     Every time I bake something with my mom’s knowledge, it needs to be chocolate and peanut butter. This is her rule. It’s a good one, but it gets old. After so many chocolate peanut butter cakes throughout the years, I wanted my birthday cake to be different. First of all, instead of the chocolate cake base I always always make in some form, I went with vanilla. I chose my favorite vanilla cake recipe, a doubled variation on Isa Chandra’s Vanilla Bean Cupcakes, minus the vanilla bean (which I have never had/used and that makes me sad. Future birthday present? Actually if you want to get me a present, get me a Vitamix), converted into layer cakes. And then I proceeded to throw together the most ridiculously poor ice cream cake probably ever seen. (Poor looking, and poorly constructed. Obviously not poor tasting!)

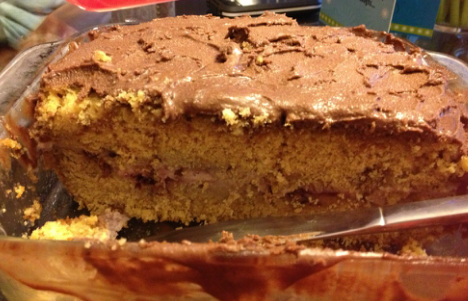
PictureIt doesn’t look too bad when it’s sliced, does it? But it was, oh it was. Have faith.

First, make the cake.

BEST EVER VANILLA CAKE
Adapted from Isa Chandra Moskowitz’s Vanilla Bean cupcakes

  • 2C unsweetened non-dairy milk (vanilla almond is my choice) 
  • 3t apple cider vinegar 
  • 2½ C all-purpose flour
  • 2t baking powder
  • 1t baking soda
  • 1t salt
  • 2/3C canola oil
  • 1¼ C sugar
  • 2t vanilla extract

Preheat oven to 350°. Pour the milk and apple cider vinegar into a measuring cup; let it stand for at least five minutes until it curdles. I usually leave it for longer to ensure quality curdling action. Mix the dry ingredients (minus the sugar) in a mixing bowl. Add the sugar, then the oil, vanilla, and curdly milk and mix until just combined; do not overmix. Pour into two 8x8inch baking pans, or two round ones, or do what I did and do one square pan and one circular. (You should also wear 2 different shoes.) Bake for 45 minutes.

LET THE CAKES COOL. Like, for hours, not for 15 minutes like I did. Holy crap, I’m serious.


Picture

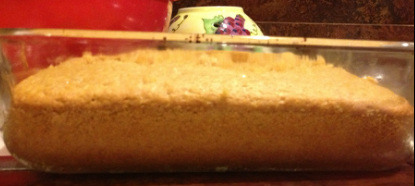
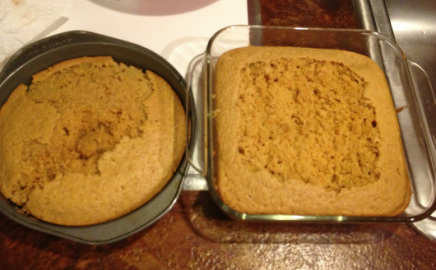
See how it rose in the middle? Level that off the tops of the cakes. This is a great thing to do because you get to eat some of the cake before it’s ‘cake time’. Because this is just a sneaky way to eat warm cake without damaging the structure, I have no instructions for how to really do this. You should be able to tell when it’s flat enough, or when you are full enough. I guess it also makes the cakes more amenable to layering and topping with stuff. Really, just do it because it lets you eat the cake immediately. And it’s real good.

Picture

NEXT!


ONCE YOUR CAKES ARE COOL. 

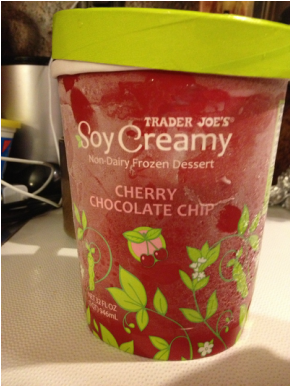
Take out your ice cream of choice. I used Trader Joe’s Cherry Chocolate Chip soy ice cream. It’s gooood. It reminds me of my childhood favorite, Ben & Jerry’s Cherry Garcia, but it’s better because it’s doesn’t hurt animals OR your stomach! By the by, is there a website yet that has veganized the Ben & Jerry’s flavors? Because I’d buy an ice cream maker for that purpose. K maybe I’ll do it. I’m on it! 


Getting back to the task at hand…
Let your ice cream thaw for a good 30 minutes. If it’s really super crazy hot in your kitchen, you’ll probably only want to leave it out for 15-20. We don’t want milk here. Also, I’m sorry you’re so hot! 


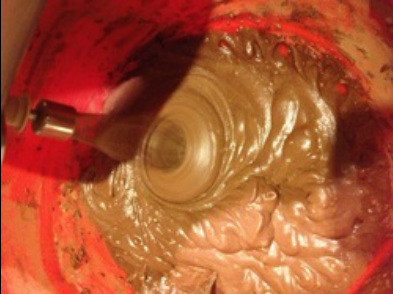
PictureAction shot! So fun!

     Next, while your ice cream is thawing and your cakes are cooling (or if you are like me, while the cakes are cooking because you didn’t allow them to cool), make your frosting! 
     I mixed a bag of Trader Joe’s confectioner’s sugar (a pound) with 1/4C cocoa powder and 1/3C Earth Balance, plus splashes of almond milk. And then, as you can see at right, I mixed it with a hand blender. 
     Tip: Put the bowl in the sink, because this will shoot powder, both the sugar and cocoa variety, all over the place. 

     Then, when the cakes are cool (FREAL), smear a thick layer of the ice cream on top of your bottom layer. I like to flatten out scoops of the ice cream with my hands, then throw it down on the cake, then lick my hands. No I’m kidding I don’t really do that. Anyway, so you have your ice cream layer. If you have enough frosting, drop a layer of that on top of the ice cream before placing the second cake layer on top. Then top the second layer (and, if like me you used a circle on top of a square, top the exposed corners as well) with the frosting. If you didn’t listen to me but instead followed my example and you assembled this while the cake was still really warm, then by now you realize that you have a HUGE PILE OF MELTING STUFF oozing out onto the counter in front of you and then in a minute ahhhh there it goes onto the floor below you! All down the side of the counter and now oh no! It’s oozing towards your feet! Oh my god you have to contain this delicious sugary mess but you have frosting-ice cream mash-up on your FEET! What is the proper triage order for this fiasco?? Feet or cake? FEET OR CAKE????? Breathe! Towel off your feet because you’re going to be walking soon! You’re going to toss the baking dish of mudsliding horror onto a huge baking sheet and RUN DO NOT WALK to the freezer, where hopefully you already made room*. (Hint: Go back in time and make room!) You are going to throw that sliming overflowing monster into the freezer, cover it with a loose sheet of aluminium or saran wrap, and pray to all that is holy that it stops oozing at some point before your birthday. The end.

*If you were a goody two shoes and you assembled it properly, you still need to put the whole thing in the freezer. You just don’t have to scream while doing it. 


Picture

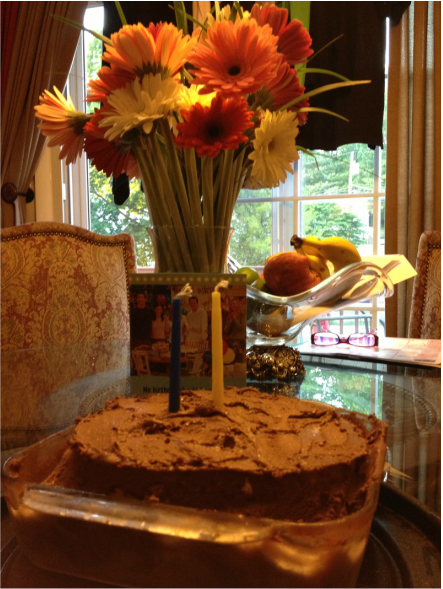
Ta daaa! My epic cock-up turned out to be delicious, naturally; It was just a problem of construction. Those corners though, once they froze? Incredible. It turned into a cross between frosting and ice cream, obviously, since those two things melted together. It was amazing. At right, see my beautiful birthday flowers and my ‘Friends’ birthday card. A-nice!
Related Posts
Leave a Reply

Your email address will not be published. Required fields are marked *